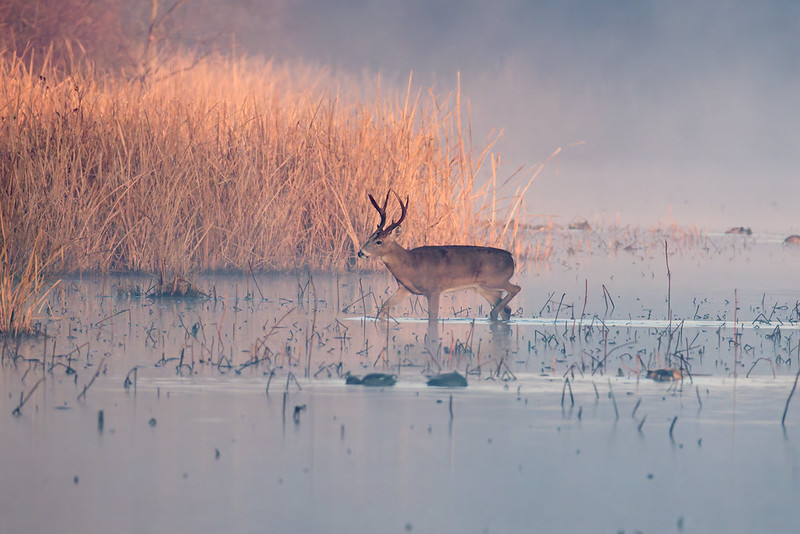
I love wildlife photography because it rewards the kind of work you cannot fake. You have to show up, pay attention, and let the moment happen. The best photos I have made did not come from chasing an animal. They came from reading the situation and being patient long enough for the animal to relax and do what it was already going to do.
Approaching Wildlife Safely and Ethically
If I get one thing right in the field, it is this: my photo is never worth stressing an animal. When I approach wildlife the right way, I get better behavior, better light, better compositions, and I leave the place the same as I found it.
Here’s how I think about it.
The goal is not “closer”
The goal is calm, natural behavior.
When an animal feels pressured, it changes what it is doing. That usually ruins the photo anyway. Heads go up. Bodies tense. Eyes lock on me. Birds start “alert posture” scanning. Deer stop feeding and stare. That is my cue that I am too close, too fast, or too obvious.
If I see that, I back off. Always.
Start with research that matters
I do not need a PhD to prepare, but I do need a plan.
Before I head out, I try to answer a few practical questions:
- What time of day is the animal most active?
- What direction is the light likely to be when I arrive?
- What behavior am I hoping to photograph (feeding, flight, interaction, hunting)?
- What is the animal likely to do when disturbed?
Even 10 minutes of quick prep helps me avoid walking right into the worst angle with the worst light and the most pressure on the animal.
Move like you belong there
Fast movement is what triggers animals. I try to be boring.
What works for me:
- Move slowly and stop often.
- Avoid direct, straight-line approaches.
- Use trees, brush, or terrain to break up my outline.
- Keep my voice low (or just stay quiet).
- Do not make repeated “micro advances” when the animal is already on edge.
A lot of the time, I will stop, let the animal settle, then take a few shots from where I am. If it stays relaxed, I might adjust my position later. If it stays alert, I stay put or leave.
Use your long lens the way it was meant to be used
A telephoto lens is not just about magnification. It is about space.
If I can fill the frame from a respectful distance, I get:
- more natural behavior
- safer conditions for me
- less chance of flushing birds or spooking mammals
- fewer ethical compromises
I would rather have a sharp, well-timed photo at 500mm or 800mm than a “closer” photo that only happened because I pushed too hard.
Watch for stress signals (and treat them like a hard stop)
Wildlife usually gives you warnings. I try to listen.
Common “I’m not okay with this” signals:
- repeated head turns toward me
- freezing mid-action
- tail flicking, foot stomping, wing flicks
- alarm calls
- moving away in short bursts, then staring back
- birds shifting position repeatedly or creeping away from the perch
If I see those, I am done advancing. If the animal continues to show stress, I back out.
Do not create the scene
This is where people get in trouble.
I avoid anything that forces behavior:
- no baiting or feeding to pull an animal closer
- no pushing birds off perches for “takeoff shots”
- no approaching nests, dens, or young animals for a better angle
- no playback calls (especially during breeding season)
If I cannot get the shot without manipulating the animal, I do not take the shot. Simple as that.
Pick the “easy win” position
A small position change can improve everything without getting closer.
Instead of walking toward the subject, I’ll often:
- move to get a cleaner background
- shift so the light hits the eye better
- change my shooting height for a more natural look
- wait for the animal to move into a better opening
This is one reason patience is a superpower in wildlife photography. The scene changes if I let it.
A simple approach checklist I use in the field
When I pull up and see wildlife, I run through this quick checklist:
- Is the animal already calm? If not, I stay back and wait.
- Where is the light coming from? I position for clean light before I worry about distance.
- Can I shoot from here? If yes, I shoot now. I do not rush.
- Is my movement going to pressure the animal? If yes, I do not move.
- Is the animal changing behavior because of me? If yes, I back off.
That checklist has saved me a lot of blown opportunities.
A quick note on “patience pays”
A lot of my favorite wildlife moments happen after the first five minutes.
I get set up. I take a few safe shots. Then I wait.
When I do that, birds often go back to preening or hunting. Mammals go back to feeding. The tension drops. The photo gets better.
Related posts on my site
If you want to keep going with this series, these two tie in well:
Great idea you had. I await the next suggestions with great interest.
Thank you.